This website uses affiliate links. If you purchase a product or service after clicking a link on this site – we may earn a commission (at no additional cost to you). As an Amazon Associate, we earn from qualifying purchases.
There are three basic steps that you will need to do to create your own borax ant killer traps and use them to start killing ants. You will need to mix the poison, create and fill the traps and then place the traps. Below is a complete step-by-step guide, with pictures, showing exactly how I create my own borax ant killer traps. These 13 easy to follow steps will show you exactly how to get rid of ants effectively.
The recipe for homemade ant killer is pretty simple, and can vary. If you’ve been searching around the internet on this topic, you’ll find that people use all kinds of different recipes, mixtures, ingredients and portions or ratios when mixing borax with food to use as an ant killer. I’ve experimented and found a mixture and homemade ant trap style that works perfectly! You can use more or less, depending on how much of the mixture you need. In other words, the following recipe can be made greater or lesser. Just make sure you use the same ratios.
Step 1 – Gather Ingredients
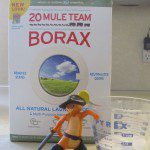
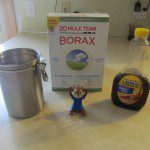 The ingredients consist of simply borax, sugar, water and syrup. The most popular brand of borax is 20 Mule Team and can be found in the laundry aisle of most stores. Plain white granulated sugar should be used. The kind you would use for baking or for putting in your coffee. Any brand or flavor of syrup is fine. Where you get your water (not pictured) really doesn’t matter. Tap water is perfectly okay. You could use bottled water if your ants are the ritzy type.
Step 2 – Measure Borax
The recipe calls for 1 part borax to 3 parts sugar. In other words, however much borax you use, you will need 3 times as much sugar. For this example, I am using 1/3 cup borax. Using a measuring cup, measure this amount and then pour it into a separate bowl for mixing.
Step 3 – Measure Sugar
In a measuring cup (same one is fine), measure 3 times the amount of sugar as the amount of borax you used. For this example, I used 1/3 cup borax so I will be using 1 cup of sugar. Pour the sugar into the same mixing bowl that the borax is already in.
Step 4 – Mix Borax and Sugar
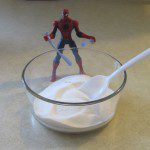
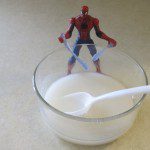
Using a spoon, spatula, fork, whisk, plastic toy or whatever else you might use for stirring – mix the borax and sugar together really good. Remove or crush any large clumps so that the mixture is a fine powder. This is a key step in the process, as you don’t want any part of the mixture to contain too much borax and too little sugar. The ants will be after the sugar and you want the fine borax powder to seem like it is part of the sugar.
Step 5 – Add Water
This part of the recipe is not an exact science. You need to add enough water to your borax/sugar mixture to make it kind of thick and pasty, but not too runny. For this example, I attempted to measure the approximate amount that I used. I found that it turned out to be somewhere between 1/4 and 1/3 cup of water. My suggestion would be to use no more water than the amount of borax that you used.
Using your choice of stirring utensil – slowly add water while stirring. The borax and sugar should already be mixed together sufficiently (step 4), so the main purpose of this step is to get the powder to dissolve into the water. Tip: Using warm or hot water could help the powder mixture dissolve easier into the water. I’ve done this step with cold water though, and the resulting mixture kills the ants just fine.
Step 7 – Add Syrup
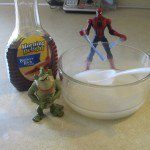
This step is also not an exact science. You can add as little or as much syrup as you want. I’ve even read other suggestions on the internet that say they use only borax mixed with syrup for their ant killer recipe. For my example, I did not attempt to measure the amount of syrup. I poured it directly from the container into the mixing bowl. My best guess is that I probably used 1/4 to 1/3 cup of syrup. A good rule of thumb could be to use about the same amount of syrup as the amount of borax and water you used.
Step 8 – Stir Syrup into Mixture
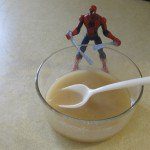
Again, using your choice stirring utensil, stir the syrup into the borax/sugar/water mixture as best you can. Keep stirring until the entire mixture is one consistent color. When you achieve this consistency, you will know that you will have the perfect borax ant killer mixture. They will not be able to resist.
Step 9 – Gather Ant Trap Containers
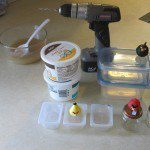 This step could be as simple as gathering paper plates, or lids to plastic containers. You could place the borax for ants poisonous mixture on these and leave them out in the open for the ants to find. For my example though, I chose to make my own homemade ant traps using various plastic containers and even glass baby food jars. I’ve found the very best (and perfect size) containers are the plastic baby food containers that come with reusable lids.
Step 10 – Drill or Poke Holes in Containers
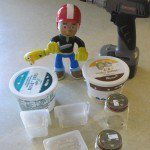 The purpose for this step is to make an entry and exit way for the ants to get in and out of the ant traps. The easiest and best way is to use a drill. I used a 3/8 inch drill bit for my example. If you do not have access to a drill, you can poke holes using anything sharp or pointy. Things that come to mind could be a pen, pencil, nail, screw or even a screwdriver. Drill or poke holes around the top of the sides of the containers and/or in the lids. Do not place holes near the bottom of the container as this would cause the borax ant killer to leak out. Avoid placing holes in the lid if the containers are going to be placed outside where rain water could get in.
Step 11 – Add Borax Ant Killer to Containers
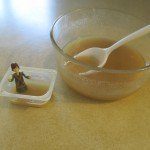 Using a spoon or small ladle, scoop your homemade ant killer out of your mixing bowl and fill each homemade ant trap. It really doesn’t matter how much or how little you put in each trap. Ants are tiny and they are never going to consume all of it anyway before they all die. You don’t want to use too little though, as you want the scent to be able to drift out of the traps so the ants will find it. I usually fill each trap about half-way.
Step 12 – Place Lids on Filled Ant Trap Containers
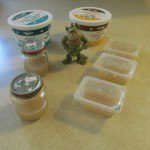 I’ve found that it is best to use containers with lids, as this make it easier to handle, transport and move the borax ant traps around without spilling. Place your lids (with or without holes) on each container.
Step 13 – Place Homemade Ant Traps
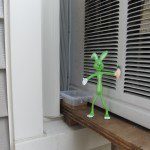 This is the part where you dangle a carrot in front of the bunny. Place the ant traps either where you know there are already ants or where you suspect they might try to get into your building. If you already have ants inside, place them in various spots at or near where you saw the ants. Make sure you read the How To Get Rid of Ants section of this site to learn exactly why and how this will be effective. The worker ants will find your homemade borax ant killer and bring it back to the colony to kill the queen and the rest of the ants.
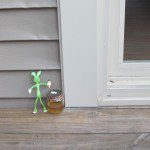 If you do not have ants inside, but are looking to simply kill them so they won’t come inside, place your homemade ant traps at or near where you suspect they might come in. Obvious placements are next to windows or doors. Place them on the ground around the perimeter of your building. Kill of those ant colonies before they ever have a chance to get inside your building. Pictured above is my placement of a trap next to a window air conditioner. Pictured to the right is my placement of a trap next to a sliding glass door.
Good luck! For proof of results, see picture on the Start Here page of this site.
Do you have a serious ant infestation?
Consider a local exterminator if you think your infestation is out of control. Simply answer a few questions below to easily obtain pricing quotes from exterminators in your area!
